Looking Like Mars
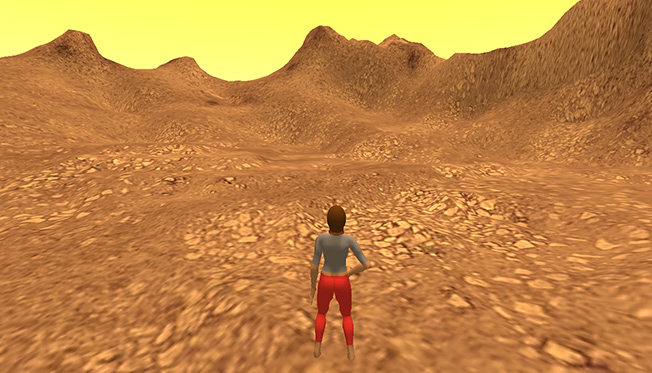
If you have followed the steps so far, you probably have a patch of land - maybe a bit spiky and rough in places - that looks like a patch of tundra on Earth. In this article we'll put a bit more work into the simulation, and make it look a bit more Martian.
Creating Textures
OpenSim uses four image files that repeat across the surface of the terrain. Each image file is assigned a different elevation, so for example the highest elevations have a rock-like image applied to them (for mountains), and in the mid-level elevations a grass image is used. We're going to use some creative licence, and replace all four with red-tinted rock images.
 Default terrain bands in OpenSim
First you are going to need some "seamless tile-able textures" - which basically means that the image can be repeated side-by-side, and the join between them is not obvious. Different textures achieve this with different degrees of success, but any will do to begin with, and you can always update them later.
- Perform a web search for free tile-able textures. The MaxTextures.com site has some good examples, but there are many other sources that you can use.
- Look in categories such as rock, dirt, ground, soil, and concrete. Choose any four images that look like they could exist on Mars. Ignore the colour - we will change that later. Just make sure that they do not contain anything obviously man-made (e.g. bricks) or organic (e.g. moss).
- I recommend 2 rock-like (for higher elevations) and 2 dusty/ground-like (for lower elevations).
- Download the images.
- Also, search for a picture of the Martian surface and download it.
We will now use image editing software to give them a red tint. Lots of programs include the feature that we need, but instructions are only included for Photoshop (with some brief pointers for GIMP):
Photoshop
- Open your image of the Martian surface.
- Select the Eye Dropper tool (press I on the keyboard).
- Click on the darkest area of the rocks to set the foreground colour.
- Hold the Alt key, and click on the lightest area of the rocks to set the background colour.
 Setting foreground and background colour in Photoshop.
Now to apply those colours to your selected image.
- Open one of the images that you have downloaded.
- The image could be very large if it is intended for use in 3D modelling. From the Image menu, choose Image Size.
- Enter 256 for the width and height, and click on OK.
- From the Image menu, choose the Adjustments section, and then Gradient Map.
You should now see the Gradient Map panel, and your image will have changed (tick the Preview box in the Gradient Map panel if you image has not changed). You can just click on OK, and use that image, but we can refine it further.
- Click on the coloured bar in the middle of the Gradient Map panel.
- The Gradient Editor will appear.
- Drag the bottom boxes in slightly from the edges.
- Click between the boxes that you just dragged, and the edges that you dragged them from. New boxes will have appeared.
- Click on the far left box and set it's colour to black.
- Click on the far right box and set it's colour to white.
 Using Photoshop's gradient editor to get better results.
- Click OK to close all panels, and then save your image as a JPEG.
- Repeat the process for the other images.
Using GIMP
The process for GIMP is much the same as for Photoshop.
- First open the image of Mars.
- Use the Color Picker tool to select the darkest colour for the foreground.
- Hold the Ctrl key on the Keyboard and click on the lightest area of the rocks to set the background colour.
- Open the image that you want to colour.
- You can resize it to 512x512 by selecting the Image menu, and then Scale Image.
- From the Colors menu, choose the Map section, and then Gradient Map.
- Save your image as a JPEG.
Loading textures into OpenSim
Using the terrain textures is not as quick as loading in the height-map, but there is nothing difficult to do.
- Ensure that OpenSim is running
- Start a viewer (such as Firestorm), and login.
- Start by uploading the image for the highest elevation. For example, in Firestorm, Press Ctrl+I to open the Inventory; then click on the plus-sign at the bottom of the panel and choose to upload an image.
- The image will now be listed in your inventory. Right-click on it and choose Copy Asset UUID.
- In the OpenSim console enter the command (but do not press return): set terrain texture 3
- Right-click on the title bar of the OpenSim console, and choose Edit, then Paste
 Pasting values into the OpenSim console
- Press return, and you should see the results instantly.
- Repeat the process for the other images, subtracting 1 from the level each time (e.g. the next one would be set terrain texture 2 ...).
 Textures applied to OpenSim. The sky has also been adjusted (see below).
Martian Sky
Except for the ending of the original Total Recall film, you are not likely to see blue skies on Mars. We can can easily change this in our simulation; but these changes are what we call "client-side", which means that each person that visits your simulation would need to make their own. Again, I'm going to assume that you are using Firestorm, but other viewers will be similar.
- From the World menu, choose the Sun Position Section, and then the Midday option. With the environment at its brightest, we will get a clearer idea of the colours.
- From the World menu, choose the Environment Editor section, then Sky Presets, and New preset...
A new panel will have appeared with lots of settings on it.
- First, give your new sky a name - e.g. MarsSky
- Click on the Clouds tab, just underneath the name.
- Drag the D slider all the way to the left to remove the clouds. There are clouds on Mars, but we'll stick with the haze that seems most common.
- Switch back to the Atmosphere and Sun tab.
- Click on the coloured box for BluHrz to open the Color Picker.
- Note the position of the black cursor. Select a point in the colour box on the same vertical level, but towards the left (see below). Then click OK.
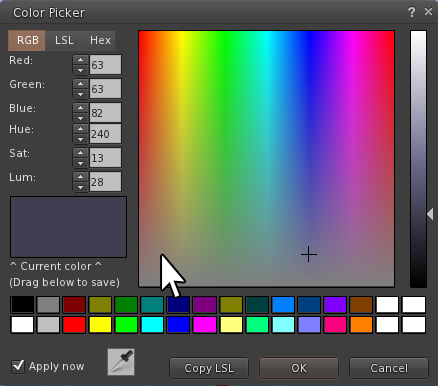 Firestorm colour picker for atmosphere settings.
- Do the same for the BlueDen colour.
- Reduce the HazHoz value to around 0.1, to reduce the brightness of the horizon.
- Set the DistMult value to around 7 to increase the haziness. It can jump in quite large steps.
- Tick the box at the bottom to Make this preset my new sky setting, and click Save.
 View of the sky, before and after making the changes.
This was just a quick and easy adjustment to the sky, but feel free to play around with the settings until you have something that you are happy with.
Martian Water
The process for changing the water is similar to changing the sky.
- From the World menu, choose the Environment Editor section, then Water Presets, and New preset...
- Enter a name for your preset, e.g. MarsWater
- Click on the image for the Normal Map
- Click on the Blank button, and then click OK
- Switch to the Reflection tab.
- Set the Fresnel Scale to zero.
- Tick the box to Make this preset my new water setting, and click on the Save button.
This isn't ideal, but so long as you stay above sea level in the simulation, you won't notice it.